About 20 years ago when I first started painting walls, I decided to paint my walls taupe. WELL - I took myself to Home Depot, picked out what I thought was a lovely color, and bought 4 gallons. When I got home, put it on the walls, it looked lavender. SO...I went back to Home Depot, picked another lovely color, and bought one gallon. I took it home, put it on the wall, and it was mauve. The next time, I went to Home Depot, picked up some paint chips, and came home and taped them to my wall. I was finally able to pick out a taupe color that looked good on my now pink and purple walls! The moral of the story is, never try to pick out paint without "trying it on" first. I take home paint chips, tape them to the wall, and leave them for a day or two, so I can see how they look in the morning sun, and evening light. I also put them in different areas of the room, where the lighting reflects differently. The lighting is key. Under the fluorescent lighting at Home Depot, my samples looked lovely, but when I got them home and my dark wood floors reflected the sunlight onto the wall, it was a disaster. So, be careful when choosing your paint color, and be patient. It could save you a lot of money.
I try to use Benjamin Moore Paint www.benjaminmoore.com when I can, I love the consistency, it goes on like butter! They have a neat little tool online to help you get started, but again, take chips home!!
Some of my favorite colors, that seem to look good in any home are listed below:
Tea - it is the equivalent of Rusty Gate in Ralph Lauren that was discontinued. It is the best red ever! Not to pink, I have never seen this color look bad in any home.
Tyler Taupe - I have it in my hallway - a great neutral color for any room in the house.
Rattan - another good neutral earth tone
Mink - deep chocolate brown. YUMMY. Also if you want the equivalent of this color but in a metallic, use English Brown by Modern Masters http://www.modernmasters.com/.
So...be patient when picking your colors! Do you have a color that goes almost anywhere? Please share it with me....I need to expand my list!
Have a great day!
Nee' Nee'
Wednesday, July 20, 2011
Tuesday, July 19, 2011
Red and Turquoise Wedding Shower
I think I mentioned my lovely step-daughter, Kristin. She is a perfect example of how to draw inspiration from sources such as the Internet and then make them her own. I met her when she was 12 and had hand painted a dozen Easter eggs for her. She loved them so much, but later her little brother got into them and broke them all! I must brag on her, she graduated from college in Social Work, then one year later, got her masters, while planning a wedding. She is now married, working in a hospital, and is a wonderful little home-maker. She recently hosted a wedding shower for a friend, and it was adorable. I wanted to share the pictures with you so that you may draw inspiration from her ideas. I am so proud of my little grasshopper - she has learned her crafting lessons so well. She had one bow making lesson, and now wraps the most gorgeous gifts!!
She decided on turquoise and red for her theme. As I may have mentioned earlier, she is ETSY QUEEN! She can navigate the site so well! When I am stuck on an idea, I call upon her magical Internet powers to help me, and it comes right to my inbox! LUVHERMEANIT! She went to a store on Etsy called Green Apple Paperie http://www.etsy.com/shop/greenapplepaperie. It is closed for vacation right now, but let me tell you, she got EVERYTHING you see here from that store. The lady sent her locked PDF files for invitations, party favors....EVERYTHING! So take a look, and draw inspiration!


She decided on turquoise and red for her theme. As I may have mentioned earlier, she is ETSY QUEEN! She can navigate the site so well! When I am stuck on an idea, I call upon her magical Internet powers to help me, and it comes right to my inbox! LUVHERMEANIT! She went to a store on Etsy called Green Apple Paperie http://www.etsy.com/shop/greenapplepaperie. It is closed for vacation right now, but let me tell you, she got EVERYTHING you see here from that store. The lady sent her locked PDF files for invitations, party favors....EVERYTHING! So take a look, and draw inspiration!
Kristin made tissue roses and covered a Styrofoam heart with them. She then added the banner. CUTE!
These are little windmills that she put on straws...so cute!
She embellished this decoration with a cute paper doily.
This is a picture of the bride and groom to be. Kristin went to a website called http://homokaasu.org/rasterbator/ to create this darling block poster! ADORABLE (I am totally going to try this for my niece's upcoming shower! I will let you know how it turns out!)
Cute banner!!! She printed the letters, cut them out and used a glue gun to attach to the ribbon. I am about to cry!
She hung hand crafted paper hearts in coordinating paper over her table.
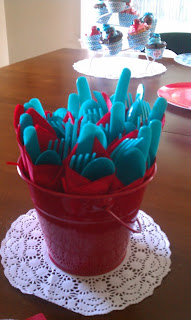
Just cute little plastic ware wrapped in coordinating colored napkins in a bucket over a doily adds to the decor.
This is may favorite, she colored her lemonade with blue food coloring, added a little sign and a BIG BOW to her beverage urn. SO CUTE.
I think she did a wonderful job hosting her first shower, and I think she was pretty budget conscience on this. If you are interested in more paper goods from Etsy, please look up Chubby Cheeks on Etsy, http://www.etsy.com/people/Chubbycheeksbysharon?ref=ls_profile. I know Sharon personally, and she makes ADORABLE paper goods to decorate with.
Let us know of any shower or party ideas you have, we would love to share!
As always, have a wonderful day. Luvyameanit, Nee' Nee'
Monday, July 18, 2011
Doors
Have you been missing a wonderfully creative opportunity to make use of the doors in your home? Take a look around and I bet you will find a few that could be dolled up!
This is my guest bathroom door. I dry brushed a little gold in a harlequin pattern with the help of a stencil. Then I tapped in upolstry nail head at the points for a little dimension.

The outside of that same door was feeling jealous, so I decided to paint it as well. First I taped it off and put some raised bands for an industrial effect. Then I painted over it in Warm Silver by Modern Masters. This paint is AWESOME! It is so thick and yummy. They say that it is so durable that it could be used as exterior paint, but I don't think anyone would, because it is pricey! A little goes a long way, so it is well worth the money! You can check out their goods at http://www.modernmasters.com/. I use the metallics on almost everything! Locally, I purchase it at Epic Paint. They are located on Jones Road in Houston, and Bo, Justin or John, are experts on paint and paint techniques. You should definitly go by there if you get a chance, I guarantee you will be inspired! You can check them out at http://www.facebook.com/pages/Epic-Paint/311453299760.
Here is the outside of the same door pictured above.

Take a closer look. Yes, that is faux crocodile on the faux inlay!

This is not for beginners, but my mom, who blessed me with the ability to create, thought of a great idea. She says she's not an artist, but I think she is pretty wonderful! This is a perfect example of drawing inspiration from something and then making it your own. After she saw my door, she took black tissue paper, cut it into diamond shapes, and glued it to her bedroom door. Take a look:

Pretty snazzy, huh? That's my wonderful mama, can you believe she is 71? What an awesome chick!

This is another door in process that painter Neff came up with recently on the doors to an entry of a fabulously faux painted bathroom:

So look around and grab a brush! Be sure to share any of your ideas...but remember, I might just decide to expound upon it and make it my own!
Have a great day!
Luvyameanit,
Nee' Nee'
Friday, July 15, 2011
How to Make Your Own Poms (a new twist on an old favorite)
I have been enlightened by my niece, Maycee, that poms are the in thing. When I asked what a pom was, she directed me to http://www.etsy.com/. If you aren't familiar with Etsy, it is an internet store where crafters like you and I sell our wares. It is a VERY FUN website to get lost in. My step-daughter, Kristin, is ETSY QUEEN...she finds the cutest things. She had an entire shower with invitations, party favors and decorations purchased from Etsy (I will show pictures later, SO CUTE!) So...check it out if you get a chance, but don't say I didn't warn you...you might be there a while!
I went to Etsy, and discovered that poms are what we used to call tissue paper flowers. Kirsten from Pom Love thought of a new twist and apparently started a craze! To see her store go to http://www.etsy.com/people/PomLove?ref=ls_profile. I remember seeing tissue paper roses at every Mexican food restaurant I went to as a kid. I loved that they were so colorful and GIANT! We used to make them in elementary school and Sunday school for different occasions.
Since I remembered how to make these from when I was a kid, I thought I would share it with you. My niece, Ashlee, is getting married in October, and I am hosting a shower for her along with my sister, Robin. Our colors for the shower are pink, black and white, so I think I will decorate the shower with poms! (can you imagine how cute it will be with Robin's bows and my poms???)
To start, you need about 12 sheets of tissue paper. Lay them out flat and then begin to fold them back and fourth like an accordion, making the folds about every 2 inches. I didn't measure, I just used my best judgement (okay folks it has been a LONG time since I was a kid making these!)


Next, find the middle of your folded tissue paper and secure it with wire or ribbon or string. You just need something to hold it together, it isn't going to show.


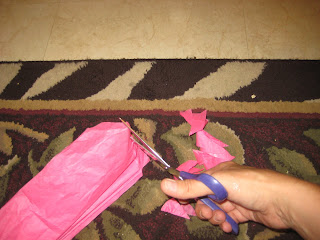
Then trim the ends of your tissue paper with a decorative cut. (fyi, that is the step that makes it a pom and not a paper rose) Cut them round or pointed, let your imagination be your guide. Different edges make for different looking flowers.


I would like to tell you, it isn't as easy as it looks. At first you may have a couple of torn "petals" but just fluff around them, it won't show!
I went to Etsy, and discovered that poms are what we used to call tissue paper flowers. Kirsten from Pom Love thought of a new twist and apparently started a craze! To see her store go to http://www.etsy.com/people/PomLove?ref=ls_profile. I remember seeing tissue paper roses at every Mexican food restaurant I went to as a kid. I loved that they were so colorful and GIANT! We used to make them in elementary school and Sunday school for different occasions.
Since I remembered how to make these from when I was a kid, I thought I would share it with you. My niece, Ashlee, is getting married in October, and I am hosting a shower for her along with my sister, Robin. Our colors for the shower are pink, black and white, so I think I will decorate the shower with poms! (can you imagine how cute it will be with Robin's bows and my poms???)
To start, you need about 12 sheets of tissue paper. Lay them out flat and then begin to fold them back and fourth like an accordion, making the folds about every 2 inches. I didn't measure, I just used my best judgement (okay folks it has been a LONG time since I was a kid making these!)


Then trim the ends of your tissue paper with a decorative cut. (fyi, that is the step that makes it a pom and not a paper rose) Cut them round or pointed, let your imagination be your guide. Different edges make for different looking flowers.

Now you are ready for something I call the Playtex bra maneuver, lift and separate. Divide the tissues about half way and pull apart. Then repeat.

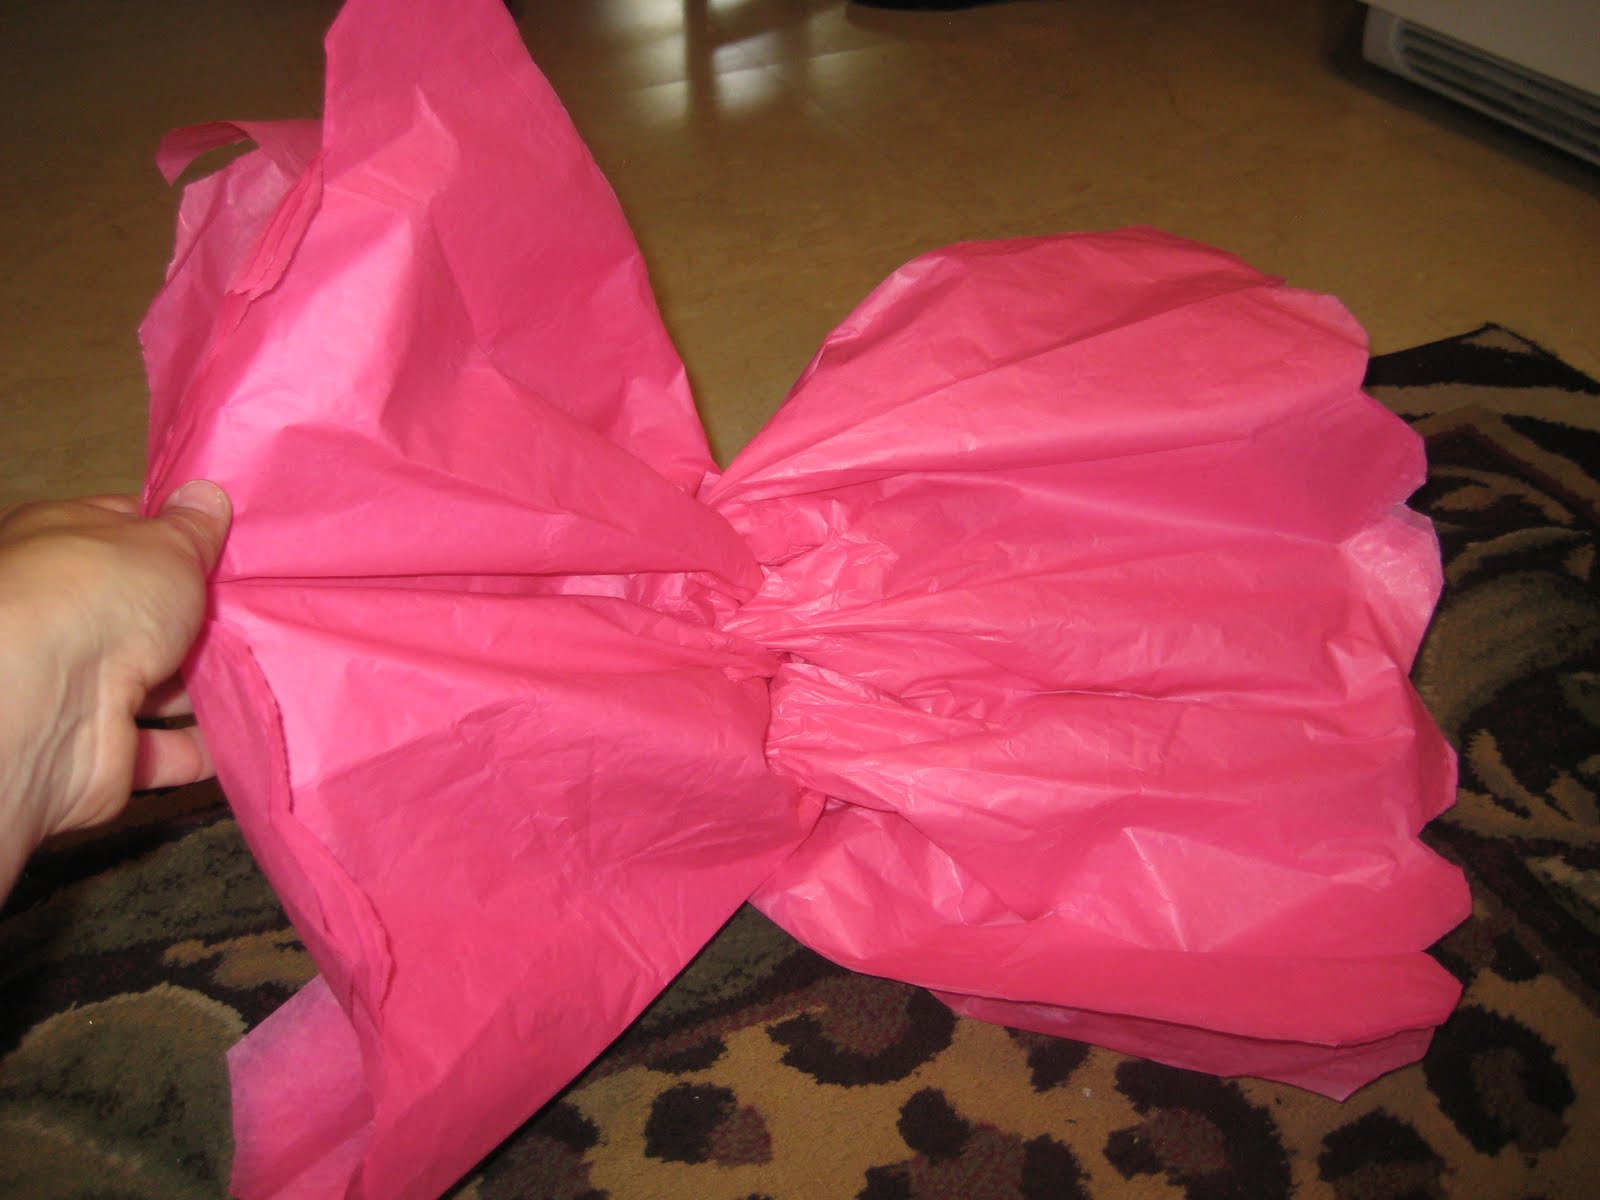
Then just like the Easter Bunny, or any good Texas girl doing her hair in the morning, fluff, fluff, fluff! This will eventually be your end result.

I made a couple of different colors to mix in. This is going to be oh so cute at the shower!

I plan on hanging mine from the ceiling with coordinating organza ribbon. I might also place a few on top of tall candle sticks. I will be sure to post the pictures after the shower so you can see them in action!
Do you have a childhood craft that can be updated? Think outside the box and let your creativity blossom! Take bread dough to a new level, jewelry or bead making maybe? Let me know what you come up with!
HAVE AN AWESOME DAY!
Luvyameanit!
Nee' Nee'
Thursday, July 14, 2011
How to Make Gorgeous Bows....and what do do with them!
My sister, Robin, puts bows on EVERYTHING!!! She will be sitting in her chair and pop up, head to her ribbon closet (yes, she has a ribbon closet, doesn't everyone?) and whip up a bow to tie on a lamp, or vase or whatever she thinks needs one at the time. I use bows to decorate for parties, showers, and oh, I must mention that I LOVE to wrap gifts. Below is a picture of a little dog table she has in her living room, that she decided to put a bow on, as well as the candle on top of the stand...and it doesn't look overdone (p.s. is there anything such as over done???). Take a look and see what you think.
 Okay, just a side note, to further illustrate how deep the "craft" jean runs, I painted the candle on the dog stand that I got from the dollar store and added nail heads to create a very elegant and pricey looking accessory!
I am constantly asked to make bows for people, evidentally, that is a big challenge that some folks face. I can't balance my checkbook, but I can make a mean bow!!! So, this is a lesson in bow making. P.S. if you think you are a lost cause, press on, my step-daughter had one lesson and you would not believe how beautiful her gifts looked from that day forward!
 Start with the ribbon color of your choice. I buy a lot of ribbon in bulk (shocker!) at Costco and Sam's Wholesale during Christmas time. They sell it in 50 yard rolls for around $8.00. I may have shown you my ribbon once, but here it is again for your viewing pleasure!
$8.00 is A DEAL! Since it takes a lot of ribbon to make a good looking bow, and they only carry the ribbon seasonally, I like to always have extra on hand! Another tip is to mix colors, patterns and textures. I say the funkier the better! (I made that my own after watching my sister Robin mix leopard print with solid color ribbon to create a gorgeous bow). If you are looking for unique or specialty ribbon, boy do I have the place for you. Cindy Jeager is a local in my community and has a wonderland of ribbon. If you are ever able to, I recommend a trip to her shop in Old Town Tomball, Texas. You definitly want to check her out at http://cindyjaegerdesigns.blogspot.com/. She was featured in TEXAS LIVE magazine and this link takes you on a virtual tour of her shop just in case you can't get by! http://www.texasliveblog.com/archives/1278
So after picking your ribbon, (p.s. ribbon with wired edges holds it's shape much better) let's make the foundation of the bow, which are the "rabbbit ears".

 About 6 inches for each rabbit ear makes a nice size bow. You will need to leave a little extra ribbon for the "hang down". You need to loop ribbon around in layers about 5 times. The more ribbon, the fluffier the bow, but I think 5 layers is a good place to start.
This is where an extra pair of hands would come in handy, but I usually just find the nearest item that can hold my layered ribbon in place. In this case, it was my husband's prized autographed Red Sox baseball signed by Josh Beckett. Are you reading my blog yet, Honey?


Next I cut another piece of ribbon, around 12" long, and tied it in a knot to hold both pieces together, and to form the middle of the bow.


Now you just fluff it up. You take each rabbit ear, pull and twist.

Here is the final product on a bare candle holder I had in my living room.
before


On a candle


I am constantly asked to make bows for people, evidentally, that is a big challenge that some folks face. I can't balance my checkbook, but I can make a mean bow!!! So, this is a lesson in bow making. P.S. if you think you are a lost cause, press on, my step-daughter had one lesson and you would not believe how beautiful her gifts looked from that day forward!

$8.00 is A DEAL! Since it takes a lot of ribbon to make a good looking bow, and they only carry the ribbon seasonally, I like to always have extra on hand! Another tip is to mix colors, patterns and textures. I say the funkier the better! (I made that my own after watching my sister Robin mix leopard print with solid color ribbon to create a gorgeous bow). If you are looking for unique or specialty ribbon, boy do I have the place for you. Cindy Jeager is a local in my community and has a wonderland of ribbon. If you are ever able to, I recommend a trip to her shop in Old Town Tomball, Texas. You definitly want to check her out at http://cindyjaegerdesigns.blogspot.com/. She was featured in TEXAS LIVE magazine and this link takes you on a virtual tour of her shop just in case you can't get by! http://www.texasliveblog.com/archives/1278
So after picking your ribbon, (p.s. ribbon with wired edges holds it's shape much better) let's make the foundation of the bow, which are the "rabbbit ears".


This is where an extra pair of hands would come in handy, but I usually just find the nearest item that can hold my layered ribbon in place. In this case, it was my husband's prized autographed Red Sox baseball signed by Josh Beckett. Are you reading my blog yet, Honey?

I followed the same steps with a coordinating ribbon.

I then stacked the coordinating ribbon on top of the original rabbit ears with my handy "paperweight" I held it in place.

Next I cut another piece of ribbon, around 12" long, and tied it in a knot to hold both pieces together, and to form the middle of the bow.


Now you just fluff it up. You take each rabbit ear, pull and twist.

Here is the final product on a bare candle holder I had in my living room.
before
after


Here are other bows that my sister added in my home:
On a picture frame


On a decorative shoe...

On a stand up wine wrack...almost looks like a Christmas tree!!! (oh, p.s. you can only imagine what her tree looks like at Christmas time...GORGEOUS!)

Oh, and I stopped by my mama's house, as you can see, Robin had been there too:
This is an outdoor lantern

A feather wreath hanging by a bow

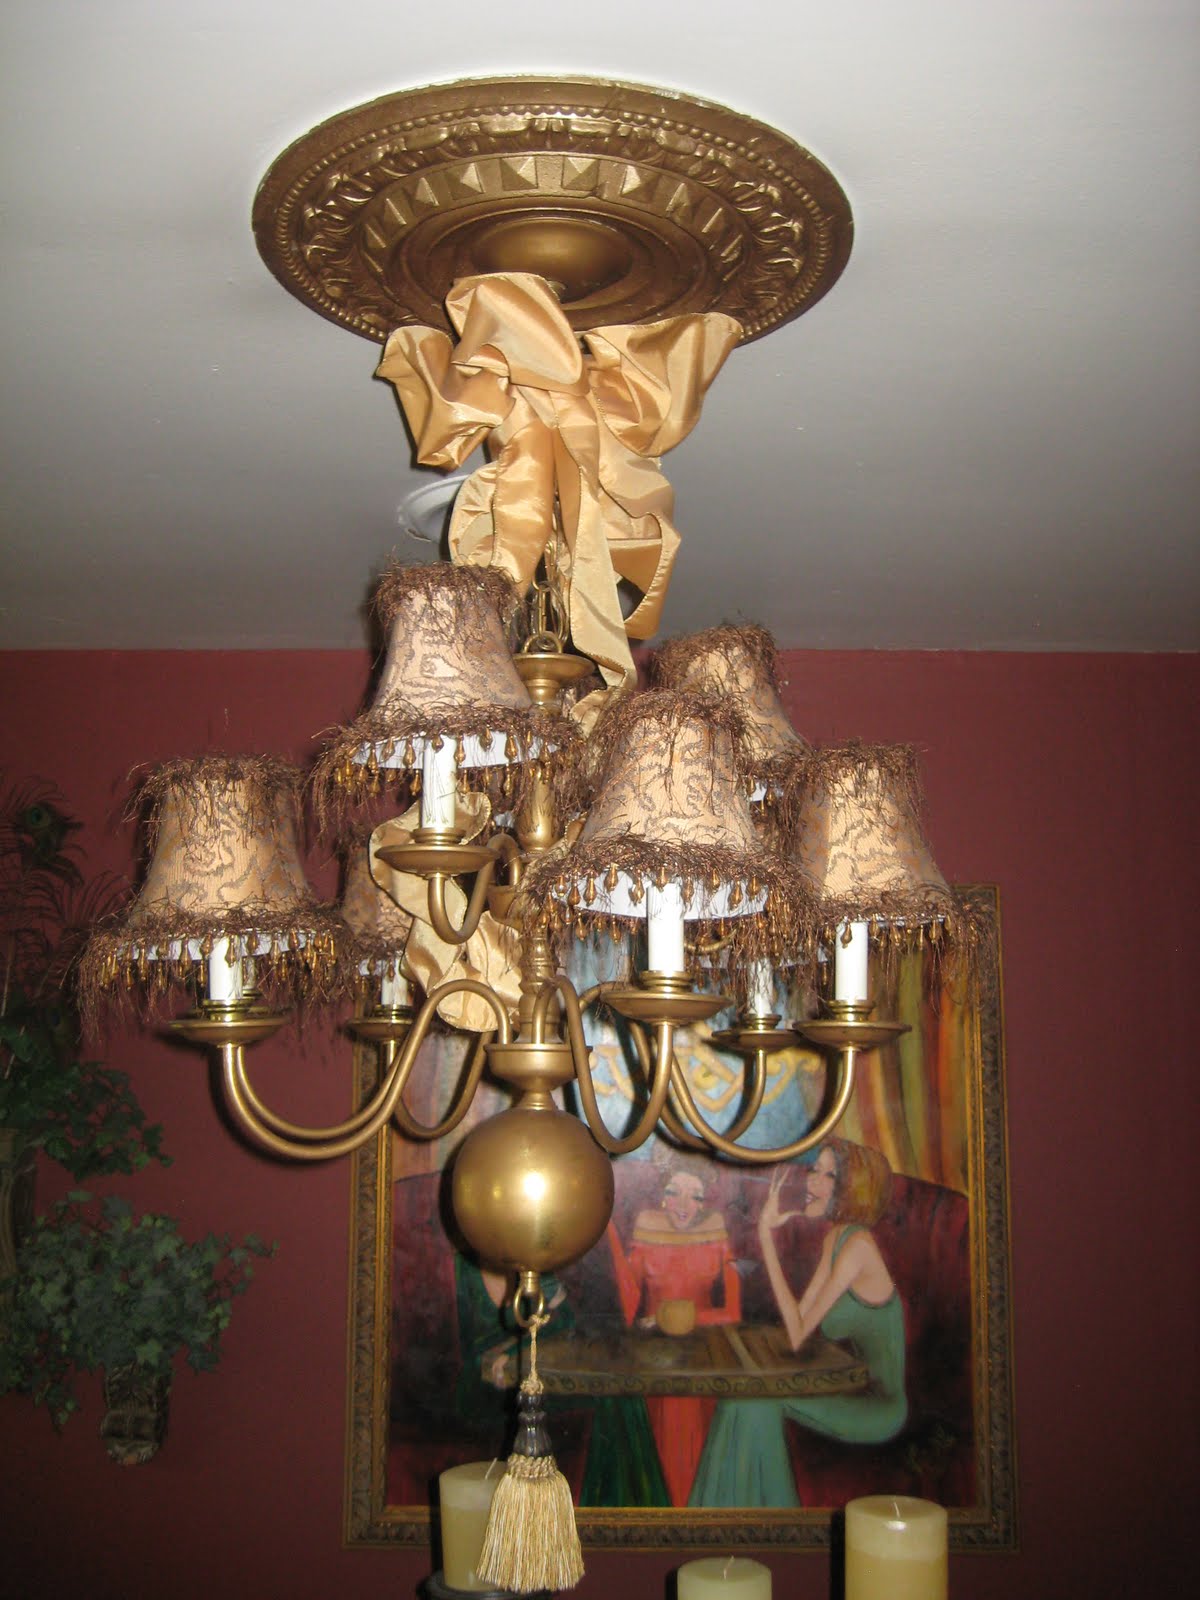
We musn't forget to put a bow on our chandelier! (I mean, how cute and creative is that??)
Okay, and my favorite, I love digital picture frames, but the design leaves a lot to be desired. She added a bow to my mom's and it looks SO DANG CUTE! As you can see, she put a little jewel from an old earring in the middle to dress it up a bit.

As you can see, some bows are fluffier than others. As with anything, add your own touches and make it your own!
If you are still not convinced...my friend Diane purchased something called the Bowdabra to decorate her Christmas tree last year for an annual Christmas party she hosts. She wanted everything to be perfect, and since she was "bow challenged" she went looking for a little help. Well, she found it, because her home looked beautiful! The Bowdabra acts as your extra pair of hands and is a very small investment, so give it a try! Their website is very helpful, it even has a video tutorial. Check it out http://www.bowdabra.com/.
Do you have a bow short cut? Where do you put bows? Are we missing something? Let us know about it!
Have a great day!
Luvyameanit!
Nee' Nee'
Wednesday, July 13, 2011
Shabby Chic Furniture Made EASY!
I don't have any children, so my nieces, nephews, step daughter and puppy are my lifeblood! My firstborn niece is 29 and all of her friends are at the age where they are starting to get married. I have watched all of them grow up and I feel very close to them. Her best friend is Cara, she was married a year ago and started her new home. I told her I would paint one of her bathroom's for a wedding gift, but she chose to have me update some of her old furniture instead. Well, this is right up my alley, because I can do it at my house in-between my 50 million other projects. When I get bored with one, I move to the next, and eventually, they all get finished!
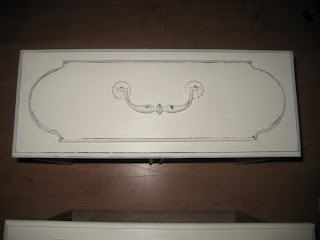
I started with the nightstand to make sure she liked what I did. Here is a before picture.


When I began, I searched the internet high and low for shabby chic furniture and got my thoughts together. I knew what I wanted the end result to be, and I went for it! I heard about something called chalk paint that I have been wanting to try, and this was the perfect project for it! A great place I visitied for inspiration that might help you too is http://www.perfectlyimperfectblog.com/2011/06/chalk-paint-faqs.html.

The chalk paint is made in the UK, but there are dealers here in the U.S. I happen to have a dealer here in my home town...how lucky am I? No shipping or handling fees! The chalk paint is made by Annie Sloan and she has instruction books that are very helpful. You can see her collection at www.anniesloan.com/acatalog/paints.html. I get my paint from Michelle at Wonderfaux Studio in Stafford, Texas. They were very helpful and made sure I had everything I needed to get started. I just read their facebook page and it said:
Their website is something to behold as well! www.wonderfauxstudio.com/
Now, let's get started. I chose Old White. This paint runs around $40.00 per quart (swallow hard) but is well worth it. I did not have to spend hours prepping my pieces with tedious sanding because, as it turns out, the paint contains lime, and instead of sitting on the surface like regular paint, waiting to chip off, it permeates the surface. I wanted some dark show through, and since the furniture was already brown, it was ready to go. I did wipe it down with regular old alchohol before I started to remove any oils because that is how I roll! Next, we're ready to paint!


This is THE perfect project for a beginner, because it is virtually idiot proof. I wanted my furniture to be shabby and have the brush strokes show a little, so it is a plus if you aren't a perfectionist. I used a 33 cent chip brush that is my alltime favorite tool!
My father saw me painting once and asked me, "Don't you have a better brush than that, Booger?" (I will explain "Booger" at a later date...but you can guess where my finger was for the first 4 years of my life by that nickname) I replied, "No, but it is the cheapest." I love disposable things...I know that isn't very green of me, but trust me, I give my brushes a work out!
When painting over a dark surface you may need 2-3 coats. I did two. When that dries (and it dries quickly) you can lightly sand around the edges with a sanding block or tiny piece of fine grit sand paper to make the edges look worn.
You use your own judgement on the sanding. You can smooth out some of the brush strokes if you want to, or can sand heavier around the handles where the pieces would have naturally worn with age. Let your creativity run wild, and if you don't like it, paint over those areas and tweek it to your liking! I am telling you, this stuff is very forgiving.
The final step (yes, can you believe we're almost finished?) is to coat the piece with clear wax. The wax is your sealer and it dries hard. The tip to remember here is LESS IS MORE! You don't need very much at all. The folks at Wonderfaux hooked me up with a waxing brush, it is especially made for this purpose, and as Martha Stewart says, the right tools for the job save you time and effort. The brush was $36.00 but if taken care of will last forever. Sometimes you have to bite the bullet folks!

Lightly dip the brush into the wax (just a little bit...you will get the feel) and GET WITH IT. Rub it in, rub it in (oh, reminds me of an old country and western song!) It is kind of like poshing shoes. Make sure you cover all areas, and wipe of any excess wax with a lint free cloth if you see any build up. THAT IS IT PEOPLE! The next day, you have a completed piece of furniture. If you need a more detailed tuturial for the waxing part (which I recommend) Miss Mustard Seed has a video that will take away any anxiety you may have. She also has great ideas and a ton of tips for this look. You can read her blog at http://missmustardseed.blogspot.com/.

That is my finished piece and I can't wait to start on the others. Cara is going to love it! I can think of a thousand things to use this paint on. Candle sticks, picture frames and what else? You fill in the blank!
Luvyameanitbye!
I started with the nightstand to make sure she liked what I did. Here is a before picture.


The chalk paint is made in the UK, but there are dealers here in the U.S. I happen to have a dealer here in my home town...how lucky am I? No shipping or handling fees! The chalk paint is made by Annie Sloan and she has instruction books that are very helpful. You can see her collection at www.anniesloan.com/acatalog/paints.html. I get my paint from Michelle at Wonderfaux Studio in Stafford, Texas. They were very helpful and made sure I had everything I needed to get started. I just read their facebook page and it said:
Their website is something to behold as well! www.wonderfauxstudio.com/
Now, let's get started. I chose Old White. This paint runs around $40.00 per quart (swallow hard) but is well worth it. I did not have to spend hours prepping my pieces with tedious sanding because, as it turns out, the paint contains lime, and instead of sitting on the surface like regular paint, waiting to chip off, it permeates the surface. I wanted some dark show through, and since the furniture was already brown, it was ready to go. I did wipe it down with regular old alchohol before I started to remove any oils because that is how I roll! Next, we're ready to paint!


This is THE perfect project for a beginner, because it is virtually idiot proof. I wanted my furniture to be shabby and have the brush strokes show a little, so it is a plus if you aren't a perfectionist. I used a 33 cent chip brush that is my alltime favorite tool!
My father saw me painting once and asked me, "Don't you have a better brush than that, Booger?" (I will explain "Booger" at a later date...but you can guess where my finger was for the first 4 years of my life by that nickname) I replied, "No, but it is the cheapest." I love disposable things...I know that isn't very green of me, but trust me, I give my brushes a work out!
When painting over a dark surface you may need 2-3 coats. I did two. When that dries (and it dries quickly) you can lightly sand around the edges with a sanding block or tiny piece of fine grit sand paper to make the edges look worn.

The final step (yes, can you believe we're almost finished?) is to coat the piece with clear wax. The wax is your sealer and it dries hard. The tip to remember here is LESS IS MORE! You don't need very much at all. The folks at Wonderfaux hooked me up with a waxing brush, it is especially made for this purpose, and as Martha Stewart says, the right tools for the job save you time and effort. The brush was $36.00 but if taken care of will last forever. Sometimes you have to bite the bullet folks!

Lightly dip the brush into the wax (just a little bit...you will get the feel) and GET WITH IT. Rub it in, rub it in (oh, reminds me of an old country and western song!) It is kind of like poshing shoes. Make sure you cover all areas, and wipe of any excess wax with a lint free cloth if you see any build up. THAT IS IT PEOPLE! The next day, you have a completed piece of furniture. If you need a more detailed tuturial for the waxing part (which I recommend) Miss Mustard Seed has a video that will take away any anxiety you may have. She also has great ideas and a ton of tips for this look. You can read her blog at http://missmustardseed.blogspot.com/.

That is my finished piece and I can't wait to start on the others. Cara is going to love it! I can think of a thousand things to use this paint on. Candle sticks, picture frames and what else? You fill in the blank!
Luvyameanitbye!
Subscribe to:
Posts (Atom)